With the modifications to the telescope complete to hopefully allow better data logging, the next thing to do was to test out the data logging and see what the results are.
I connected the telescope just like before during the data logger set up. I am using a splitter with the input going to the satellite finder, LNB and the DC power source. The output from the finder is going to an SDR and the computer.
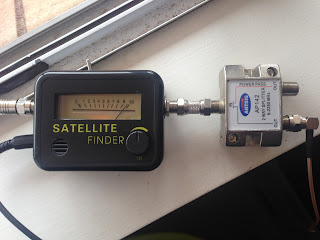 |
| Radio Telescope Setup |
The rest of the set up is identical as before with the same satellite dish, LNB and computer.
I decided to use the drift method, so I pointed the telescope at the sun using the buzzer as a guide to where it is pointed. At the same time, I also adjusted the dB knob on the finder to set a reasonable output level. I then moved the satellite dish to where the sun will be moving to, turned the buzzer off, and started the recording on the computer.
 |
| First Failed Measurement |
My first measurement failed. During the measurement and at the end the signal dropped off because the satellite finder turned off and stopped outputting. It did that because there was a bad connection in the coax line. I adjusted the connections and tried again. I also adjusted the Y axis scale to get a more detailed measurement.
 |
| Second Failed Measurement |
Once again, the measurement failed again for the same reason. After further searching, I found the connection on the back of the LNB was loose. After tightening it, I felt much more confident in my set up and ran the measurements again.
 |
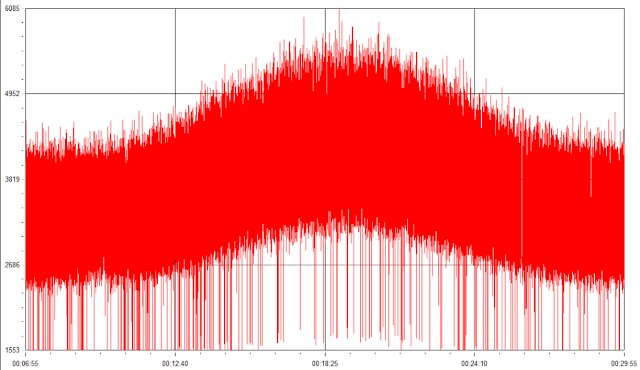
| Successful Measurement |
Third time the charm. This time there were no drop offs or breaks in the readings. You can clearly see the signal strength increase as the sun moves across the front of the satellite dish. I am still not happy with the level of noise in the signal, but that is a Radio Skypipe setting. My setup for data logging was successful.


Comments
Post a Comment